Lab 1: The Artemis Board and Bluetooth
Lab 1A
The goal of Lab 1A is to set up and become familiar with the Arduino IDE and the Artemis board.
Prelab
I already have the Arduino IDE installed on my laptop from previous classes. Going into help, then "Check for Arduino IDE Updates," I updated it to the latest version. I copied the JSON link for Sparkfun Apollo3 boards manager from Sparkfun Electronics's Artemis Development with the Arduino IDE page and pasted it to the Additional Boards Manager URLs in the Arduino IDE Settings.

I also installed the latest version of the SparkFun Apollo3 Boards in the Boards Manager.

Prior to lab, I read through SparkFun RedBoard Artemis Nano description and features, and the Artemis forums.
Task 1: Connecting to the Artemis Board
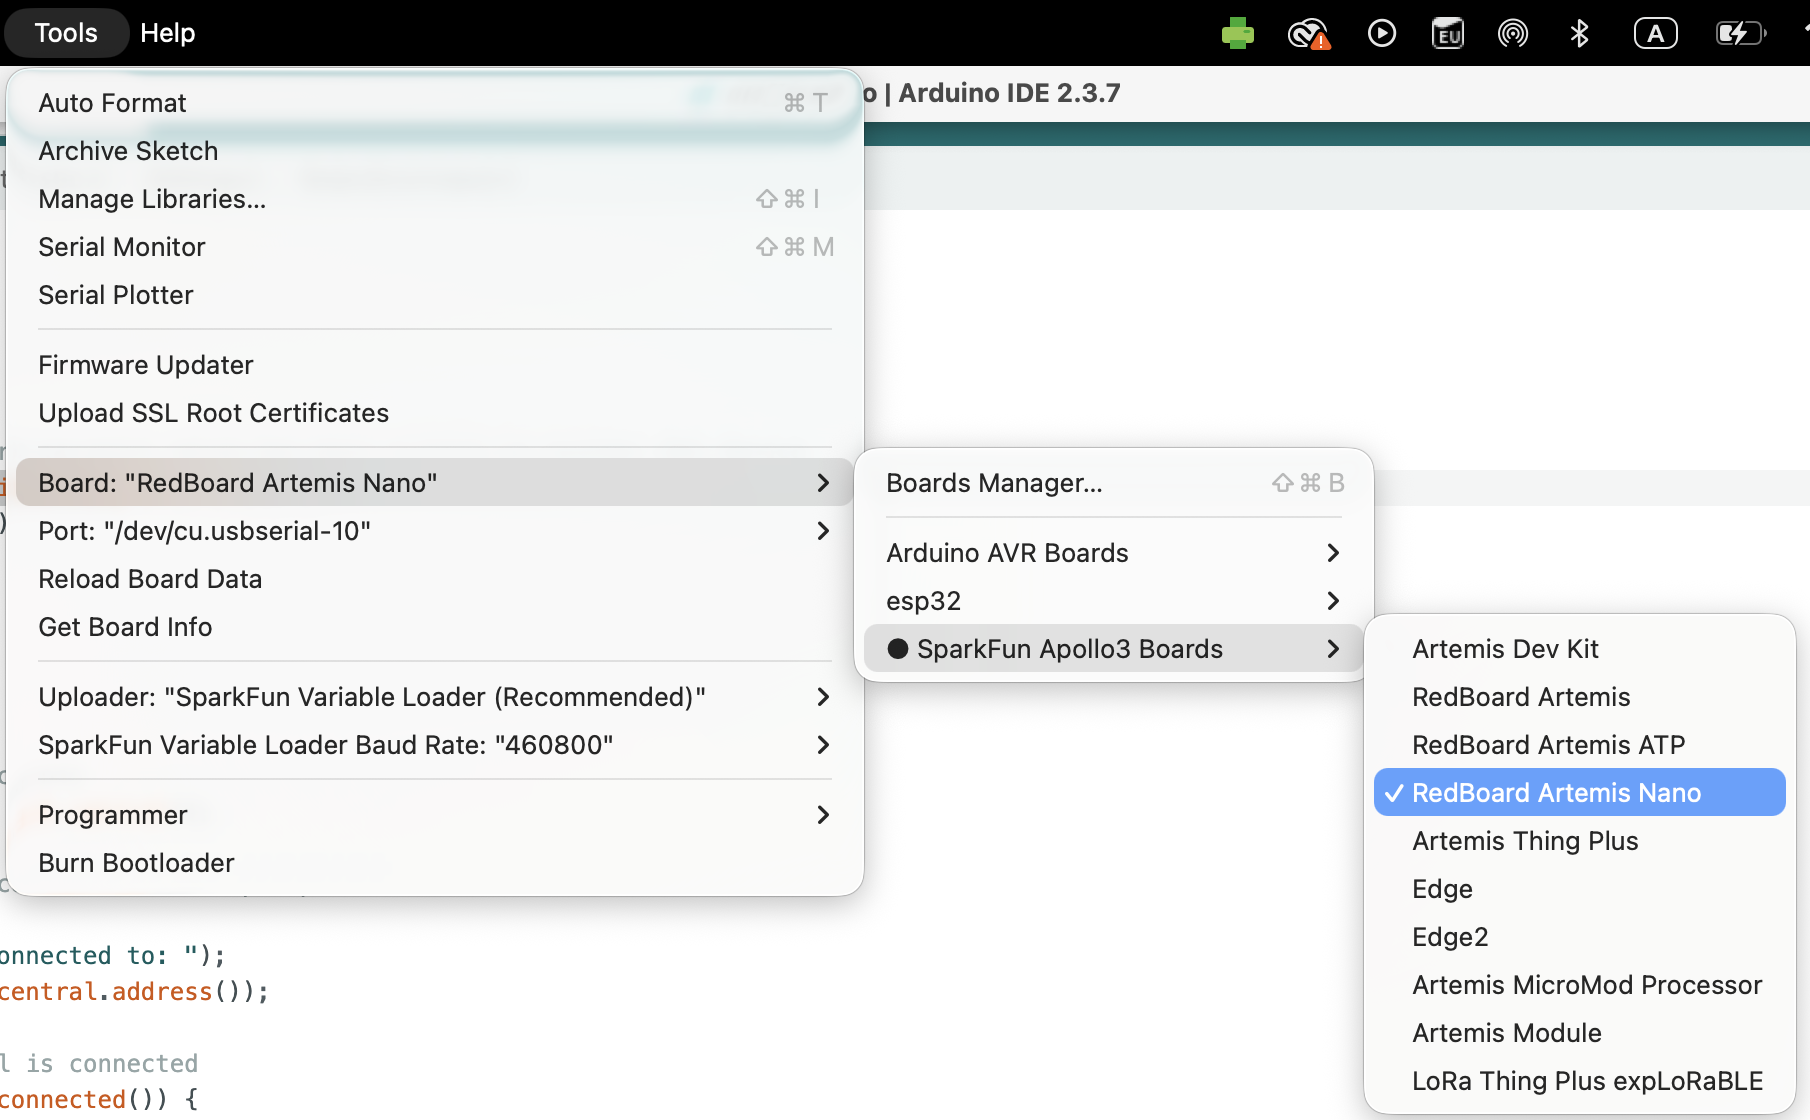
In lab, I hooked up the Artemis Board to my laptop, selected RedBoard Artemis Nano from the list of boards, and chose the correct corresponding port, /dev/cu.usbserial-10.
Task 2: Blink
To test that I completed the setup correctly, I went into File → Examples → 01.Basics, and ran Blink, an example code from Arduino.
When I first ran Blink, no changes were effected on the Artemis board. I soon realized that I forgot to select the correct port (/dev/cu.usbserial-10) on the Arduino IDE. Selecting the correct board connected the Artemis Board to the laptop, allowing me to run Blink and the other example codes.
The blue LED on the Artemis board blinks every second, giving an initial indication that the Artemis board connects correctly to my laptop and the IDE environment works. Below is a video showing the on-board Artemis LED blinking.
Task 3: Serial
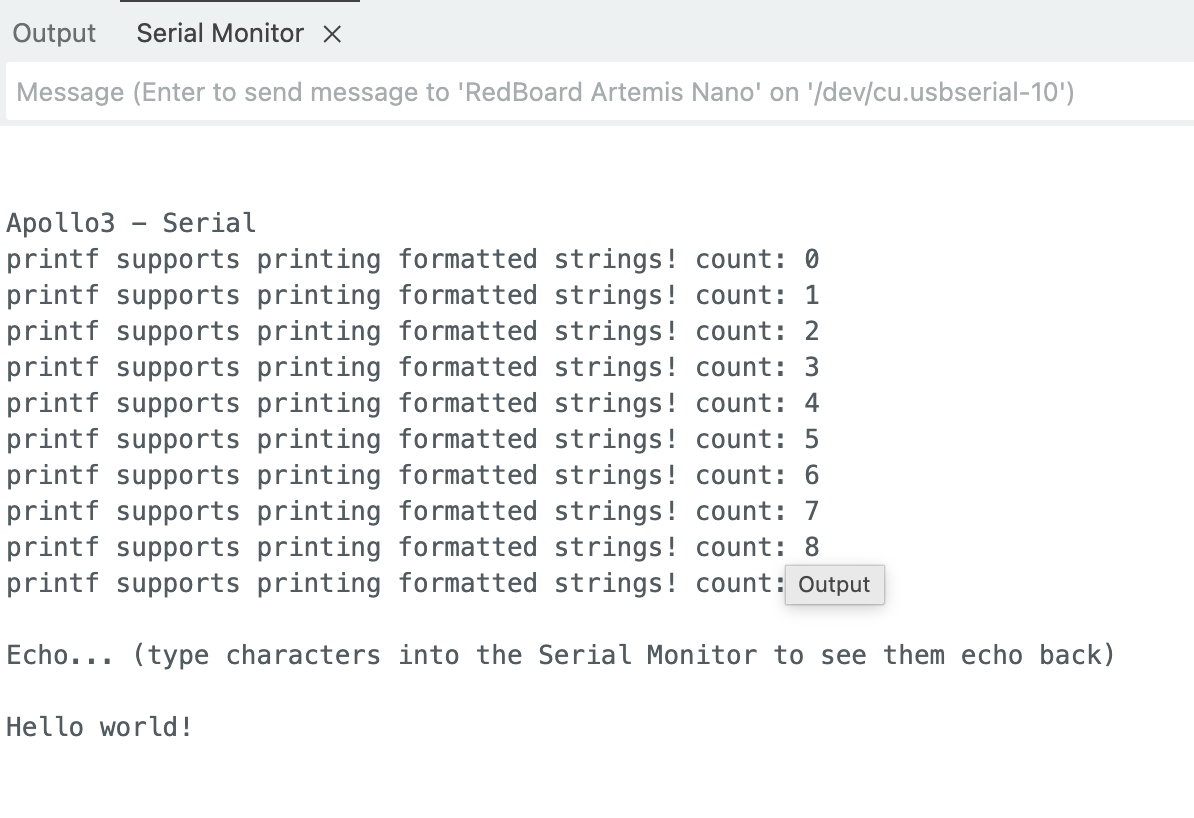
In the next part of lab, I ran Example4_Serial, from RedBoard Artemis Nano example code. The baud rate was set to 115200. I entered "Hello world!" into the serial monitor dialog box, and the Artemis board echoed back "Hello world!"
Task 4: analogRead
Then, I ran Example3_analogRead from RedBoard Artemis Nano example code to test the temperature sensor on the Artemis board. I tried blowing and touching the chip to change its temperature. The video below demonstrates this temperature change.
Task 5: MicrophoneOutput
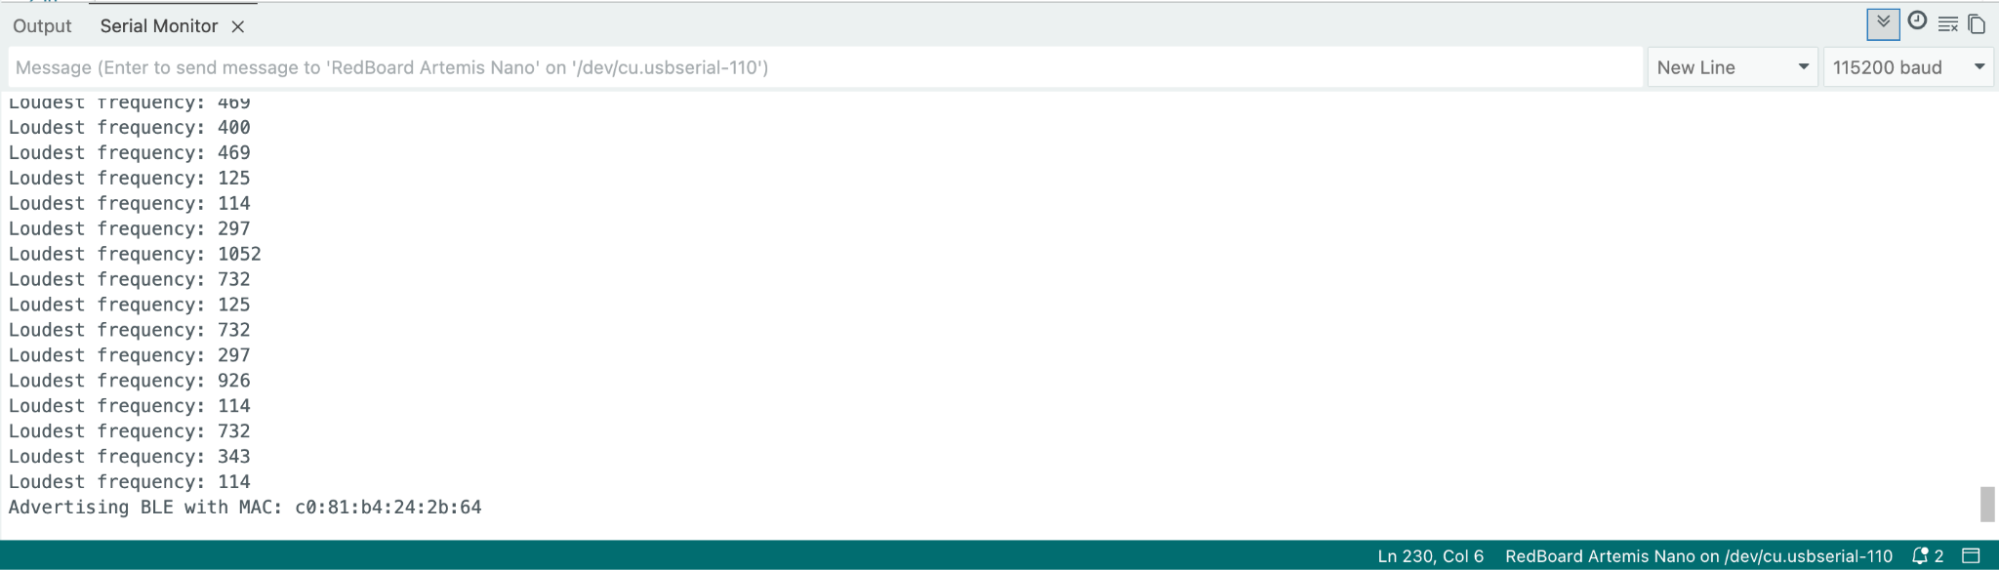
Lastly, I ran Example1_MicrophoneOutput in RedBoard Artemis Nano, PDM example code to test the board's microphone. I tried whistling at different pitches to change its detected highest frequency. As shown in the video below, the Artemis board microphone picks up sound and correctly determines its relative highest frequency.
Lab 1B
Lab 1B establishes communication between my laptop and the Artemis board using the Bluetooth stack. A data logger was build to record sensor data and its timestamps, setting up a debugging framework for future labs.
Prelab
Prior to lab, I read about the Bluetooth Low Energy (BLE) that I will be using to establish communication between my laptop and Artemis board.
My laptop sends Python commands on Jupyter Notebook to the Artemis board programmed with the Arduino programming language.
Setup:
On my laptop, I originally have Python version 3.9.12 installed, but to use Bleak in Jupyter Lab notebook, I needed to install Python versions 3.10-3.13. I avoided Python version 3.14 due to known async issues with Bleak and the lab codebase.
I downloaded the Python version 3.13 installer from the official Python website’s download page, so now I have both Python version 3.9.12 and 3.13 on my laptop. Pip is installed automatically along with the python.
In the Command Line Interface (CLI), I ran Python --version to get the version number. When I first downloaded Python version 3.13, running Python –version gave me Python 3.9.12, and running Python 3.13 gave me Python 3.13. After closing this terminal window and working in a new one the next day, this distinction goes away, and Python --version gives me Python 3.13.

Using the command python3.13 -m pip install –user virtualenv, I installed venv. Then, I created my project directory. Inside the project directory, I created a virtual environment, an isolated folder to contain its own Python scripts, libraries, and interpreter, separated from the Python installed on my operating system, and named it “FastRobots_ble”

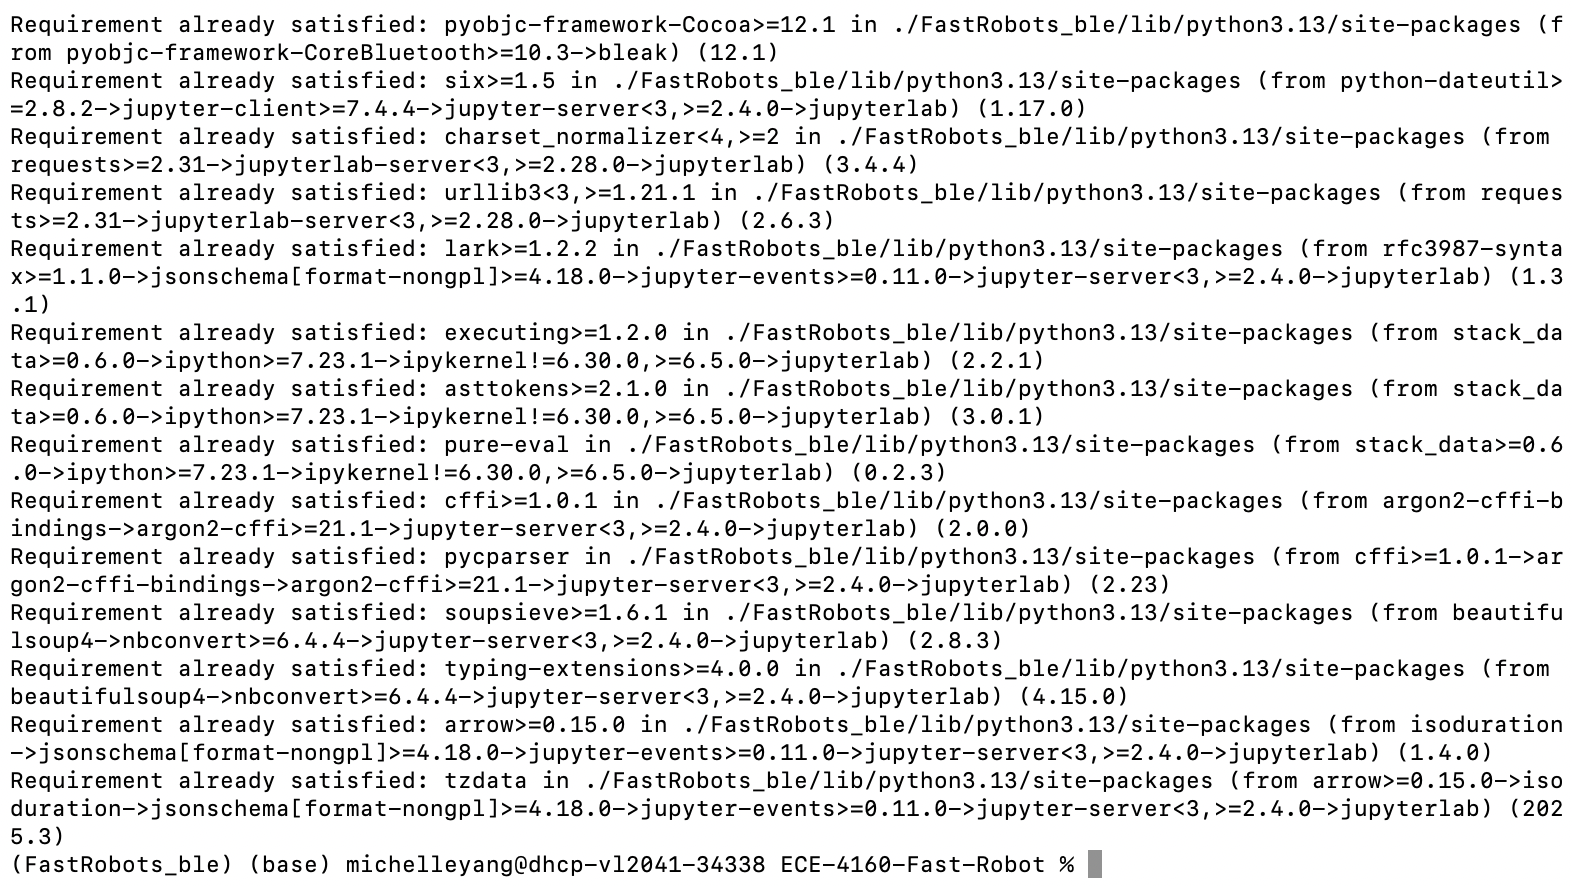
Next, I activated the virtual environment and installed the required packages. The installation completed without errors, as shown in the image below, but when I opened Jupyter Notebook and ran the imports, it reported a missing package. I forgot to capture the error message, but the issue was resolved by reinstalling the package directly within Jupyter Notebook.
Configuration:
Next, I set up Bluetooth Low Energy communication between the Artemis board and my computer. I installed the ArduinoBLE library, burned the BLE sketch to the Artemis, then configured both sides to communicate with each other. This involved updating the MAC address and generating a unique UUID so I connect to my own board rather than a classmate's.

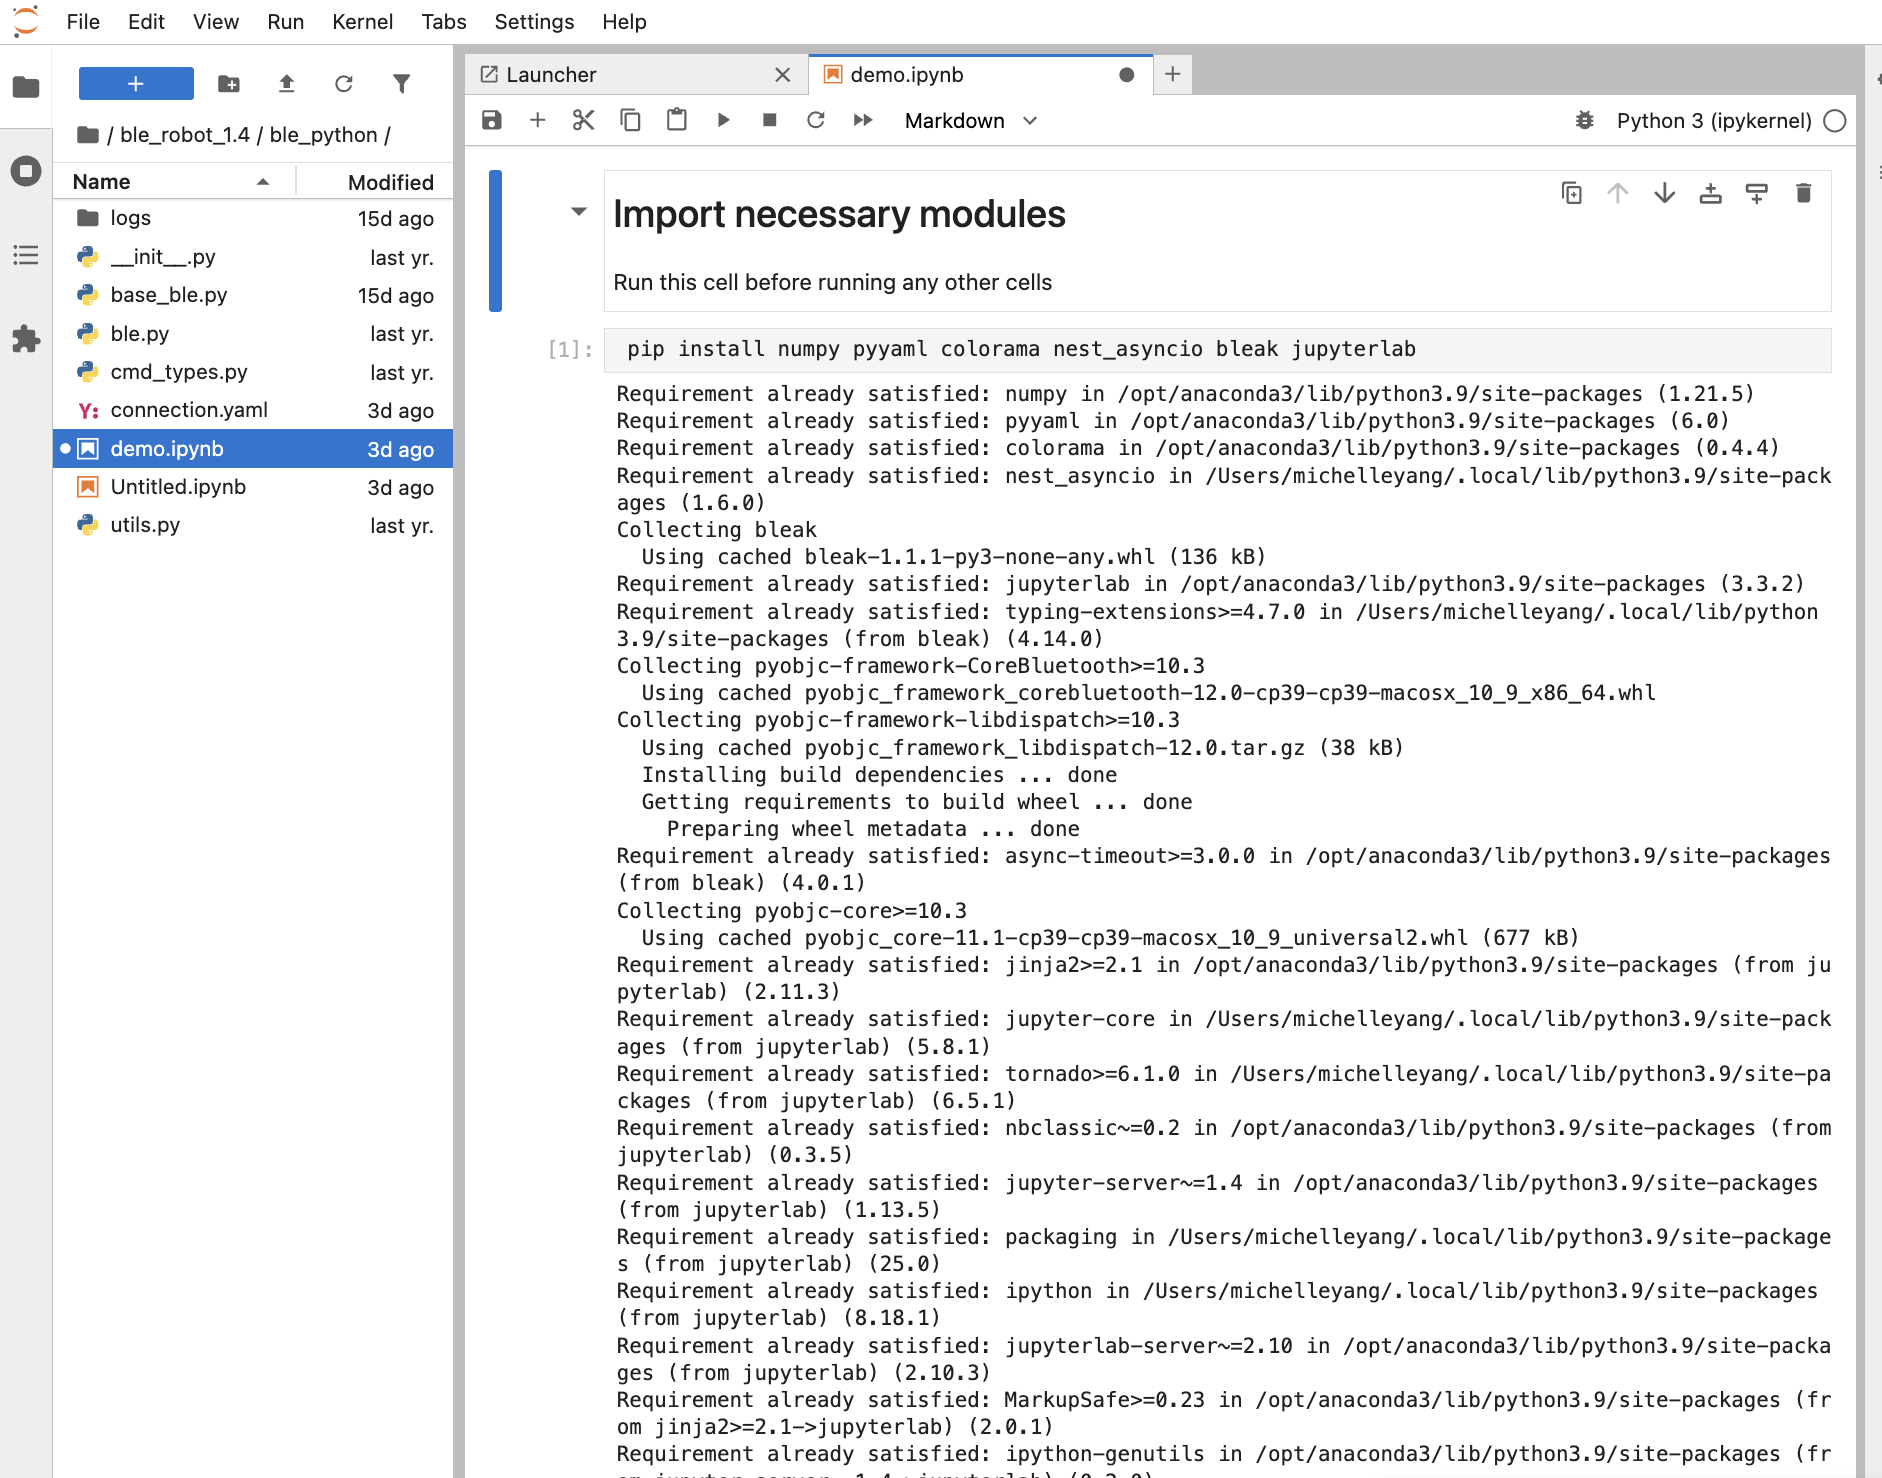
Before carrying out lab tasks, I tested BLE using demo.ipynb in JupyterLab. The below image shows the laptop successfully connecting to the Artemis board.
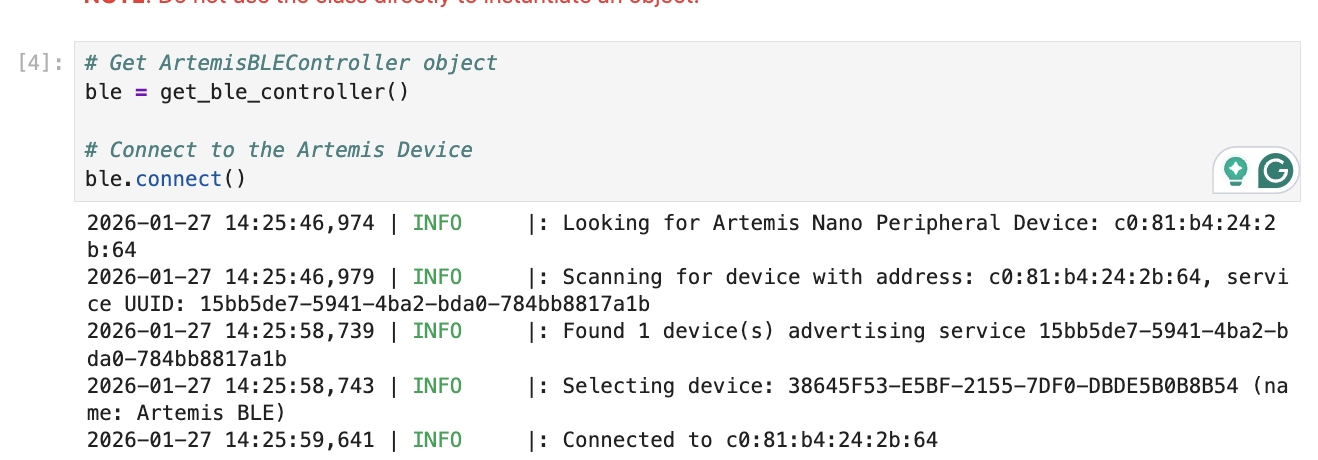
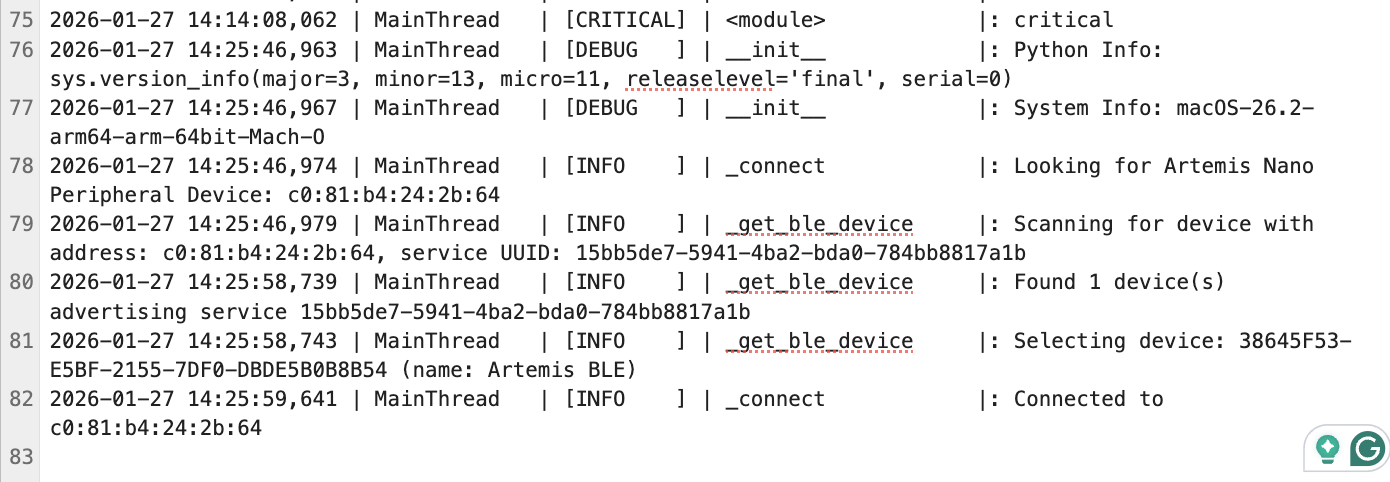
This connection activity is also logged in ble.log.
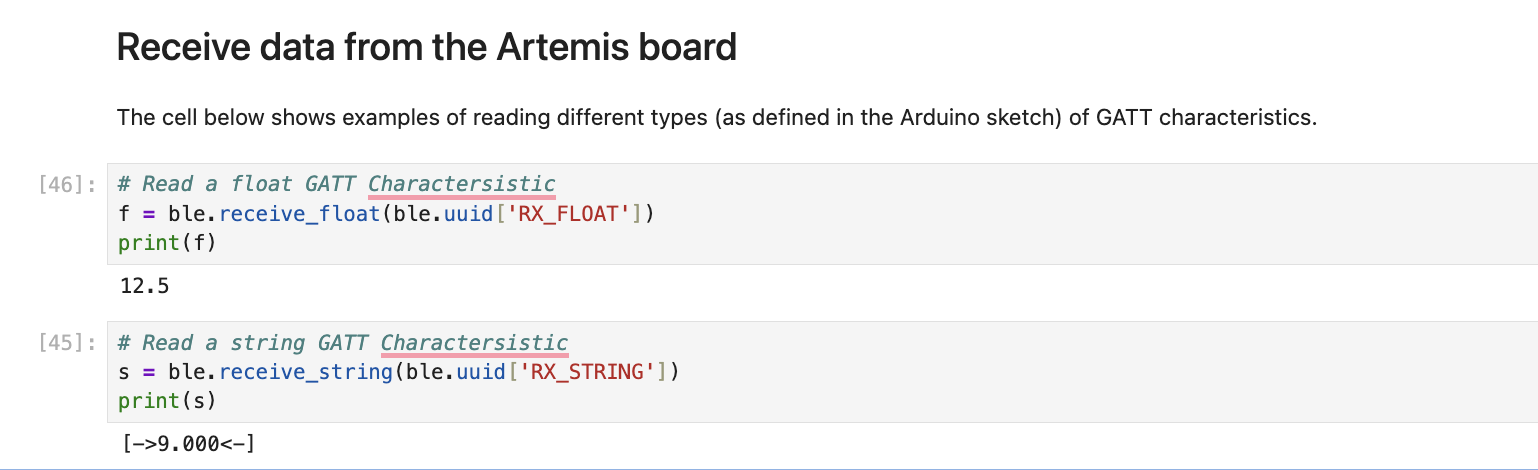
I tested bidirectional BLE communication with the Artemis board.
First, I received data by reading float and string GATT characteristics.
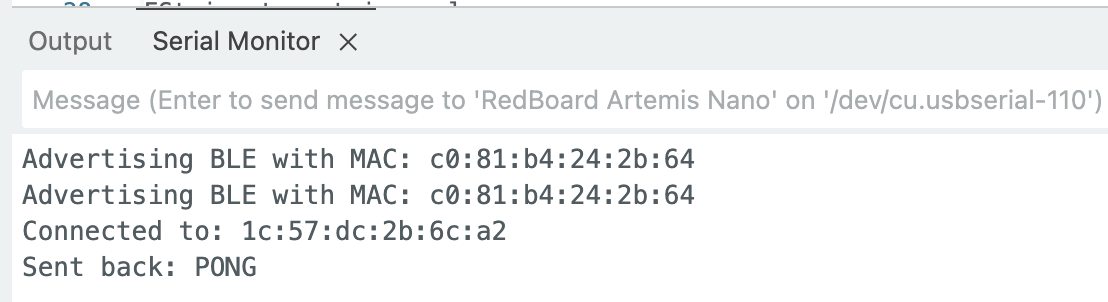
Next, I sent a PING command to the Artemis board, which returned "PONG."
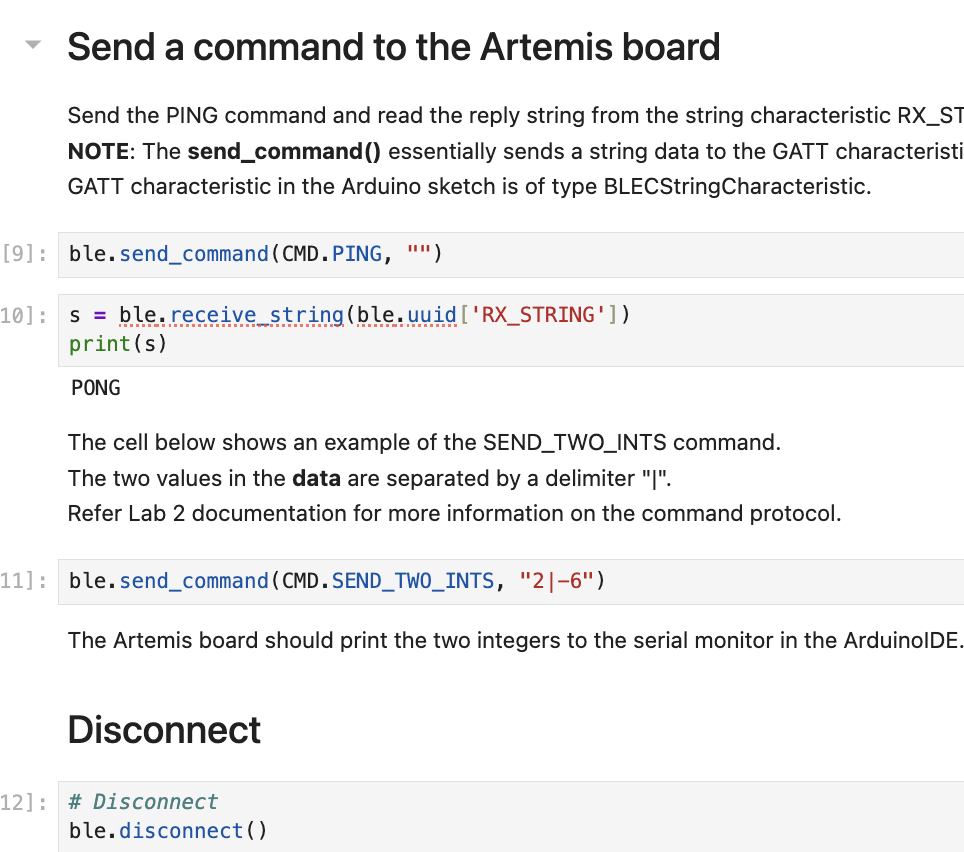
The SEND_TWO_INTS command transmitted two integers separated by a delimiter, and the Artemis printed to its serial monitor.
To test my robot’s sensors more effectively in future labs, I build a wireless debugging system which allows me to receive timestamped messages from the Artemis board. This framework was build incrementally, through the tasks below.
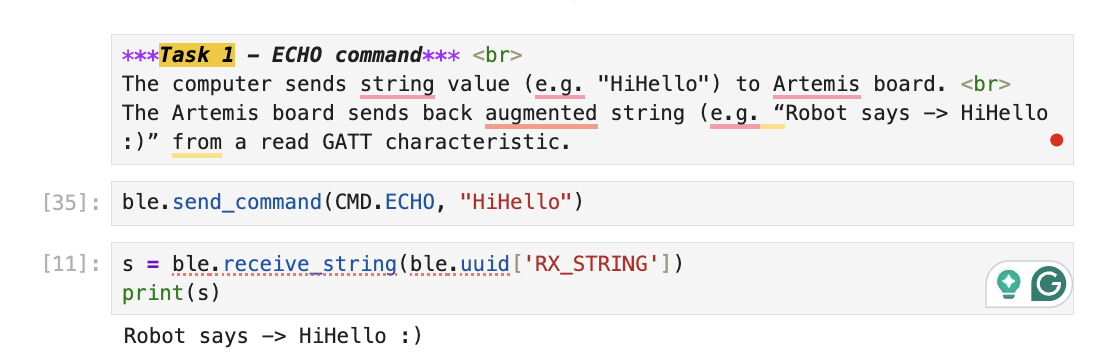
Task 1: ECHO command
I implemented an ECHO command that sends a string, "HiHello", fom the laptop to the Artemis, then received and printed the augmented reply, "Robot says -> HiHello :)".
Arduino:
Python:
Task 2: SEND_THREE_FLOATS command
I send three floats separated by delimiter "|" to the Artemis board from my laptop. The Arduino sketch extracts the three float values and print them one by one.
Arduino:
Python:
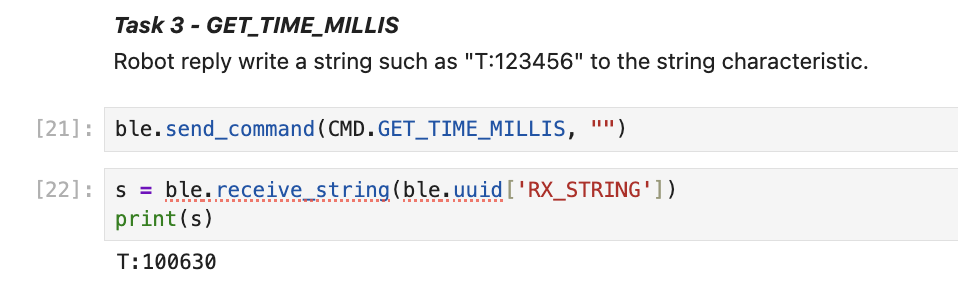
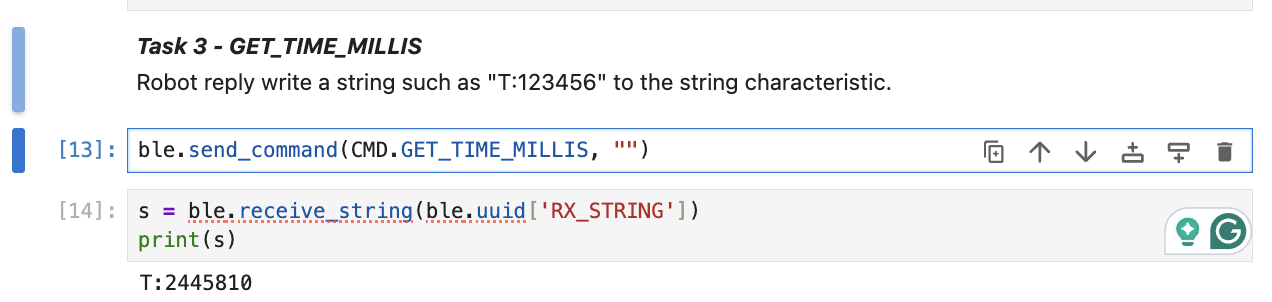
Task 3: GET_TIME_MILLIS command
I added the GET_TIME_MILLIS command to the Artemis. Like many of the following lab tasks, this new command is added as a new entry in the case statement of the Arduino code and a corresponding entry in cmd_types.py in the Python code.
Arduino:
Python:
When the command is received by the Artemis, it retrieves the current time in milliseconds using millis(), formats it as a string with the prefix "T:", and writes it to the BLE characteristic. In the example shown, sending the command returned "T:72216", indicating the Artemis had been running for about 72 seconds.
Python:
Arduino:
I added serial.print to check that the conversion was done correctly.
Task 4: Notification Handler
I set up a notification handler in Python to receive string valye from Artemis board. In the callback function, I extract the time from the string.
During my first attempt, I got this error:
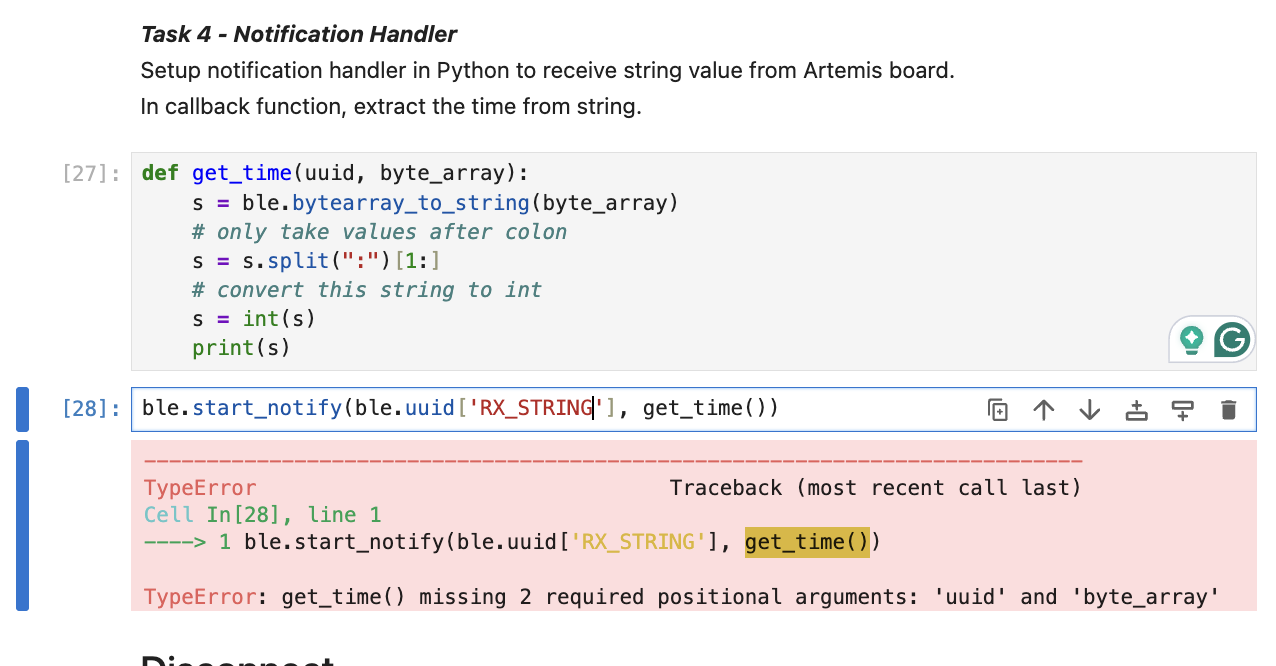
I keep on doing a function call to get_time() instead of passing the function itself, get_time, to start the notification handling. Because I don’t have any argument for get_time(), I get an error.
I gave the start_notify function get_time function, and the BLE library which defines the start_notify function waits for data from the Artemis to arrive. When data arrives, the BLE library calls the get_time function with the arrived uuid and byte_array and pass them to the get_time function as arguments.
Another issue in this screenshot is that I did s.split(“:”)[1:], and that gives me a list with the first element and the other empty elements [‘12345’] for ‘T:12345,’ but I want a string instead, so I should do s.split(“:”)[1] that gives me item at index 1.
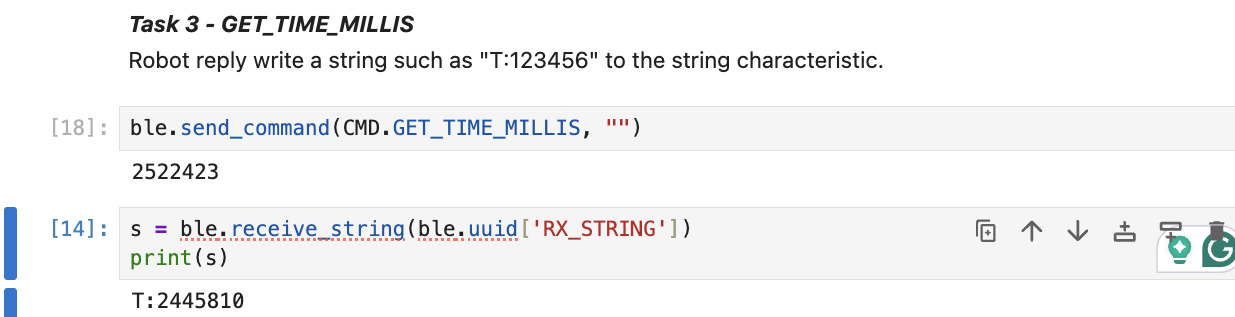
If I run task 3, the first line of code, ble.send_command, doesn’t output anything. I have to call the second line of code, ble.receive_string to get T:2445810.
If I run task 4, notification handler, then run line 50, I can continuously send get_time_millis command to artemis, artemis returns data, and ble.send_command outputs the time in ms.
Python:
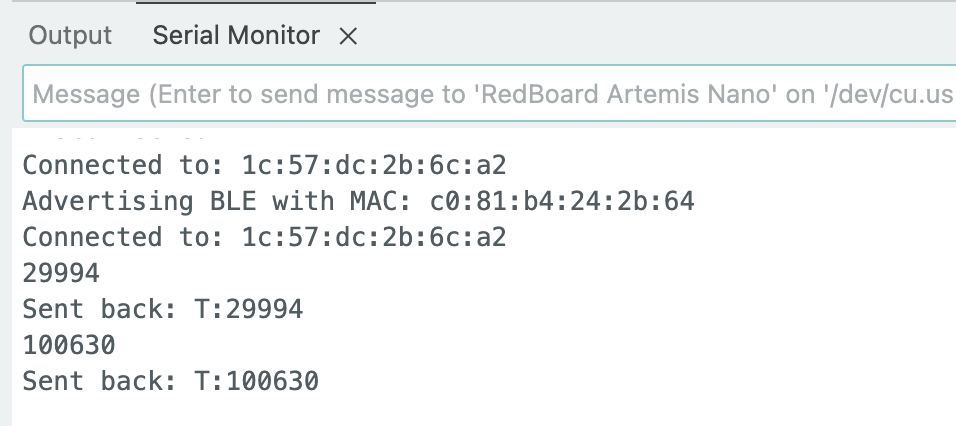
When the command is received by the Artemis, it retrieves the current time in milliseconds using millis(), formats it as a string with the prefix "T:", and writes it to the BLE characteristic. In the example shown, sending the command returned "T:100630", indicating the Artemis had been running for about 10 seconds.
Python:
I also added a line, stop_notify, to “unsubscribe” to the notification handler.
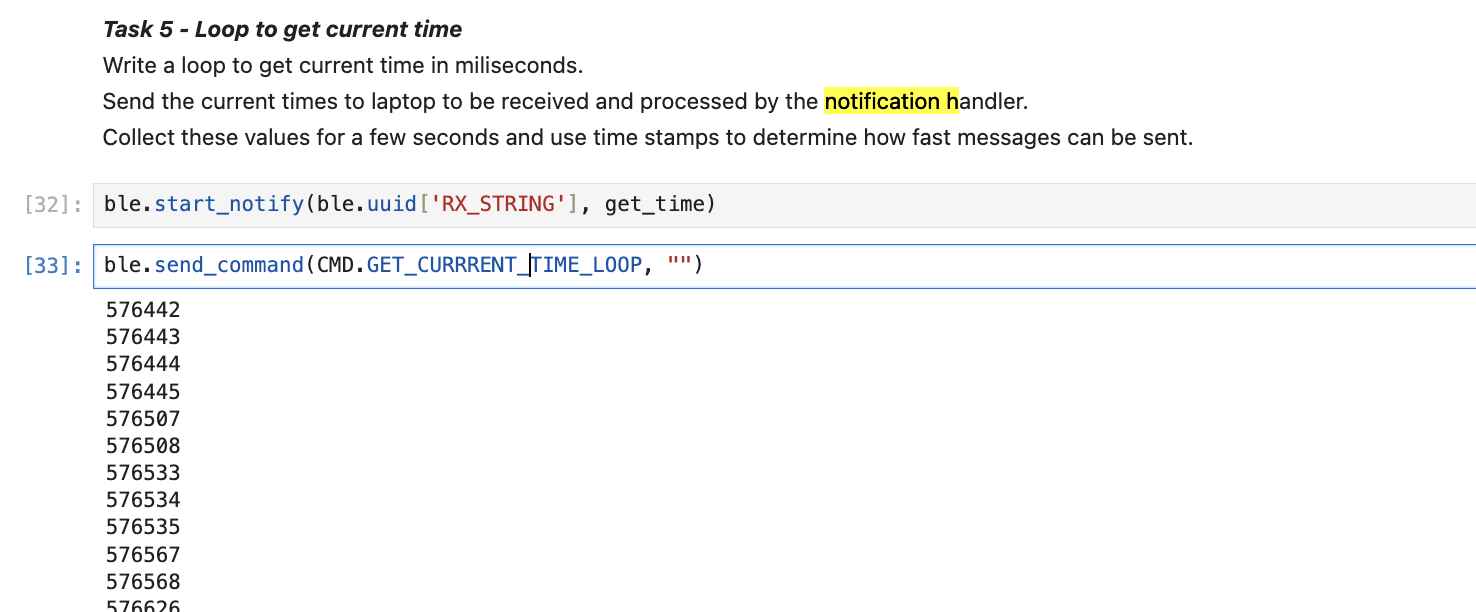
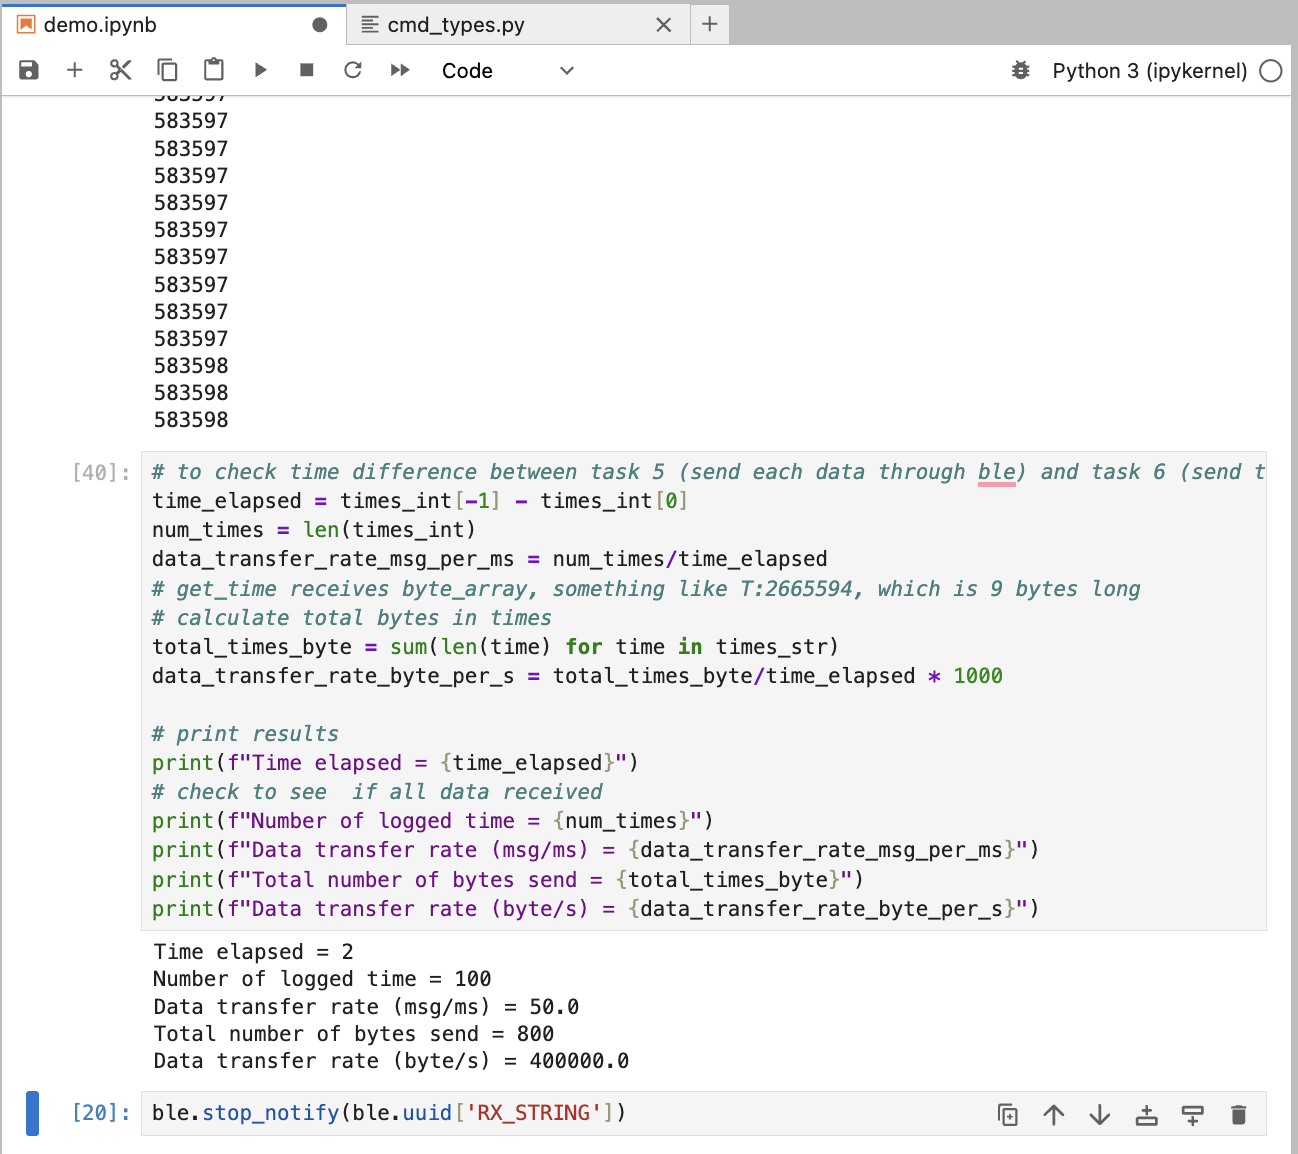
Task 5: data transfer rate
For Task 5, I measured the effective data transfer rate when sending timestamps over BLE in real-time. On the Arduino side, I created a GET_CURRENT_TIME_LOOP case that loops 100 times, where each iteration gets the current time using millis(), formats it as a string like "T:123456", and immediately sends it to the laptop using writeValue(). On the Python side, I set up a notification handler function get_time() that receives each string, parses out the timestamp after the colon, and stores the values in lists. I registered this callback using ble.start_notify(), passing the function reference without parentheses so the BLE library can call it later when data arrives.
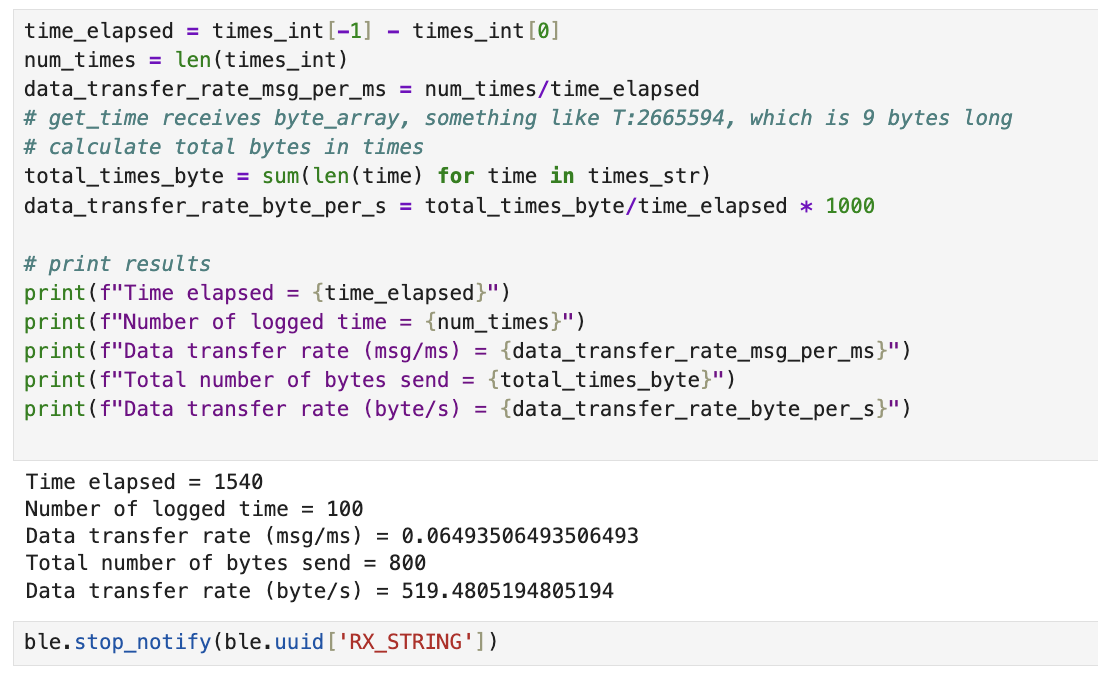
My results showed that sending 101 messages took 8587 milliseconds, giving a data transfer rate of approximately 12 messages per second or 94 bytes per second. The key finding is that BLE transmission is the bottleneck. The Arduino must wait for each writeValue() to complete before continuing to the next loop iteration, which significantly limits how fast data can be collected and sent
Arduino:
Python:
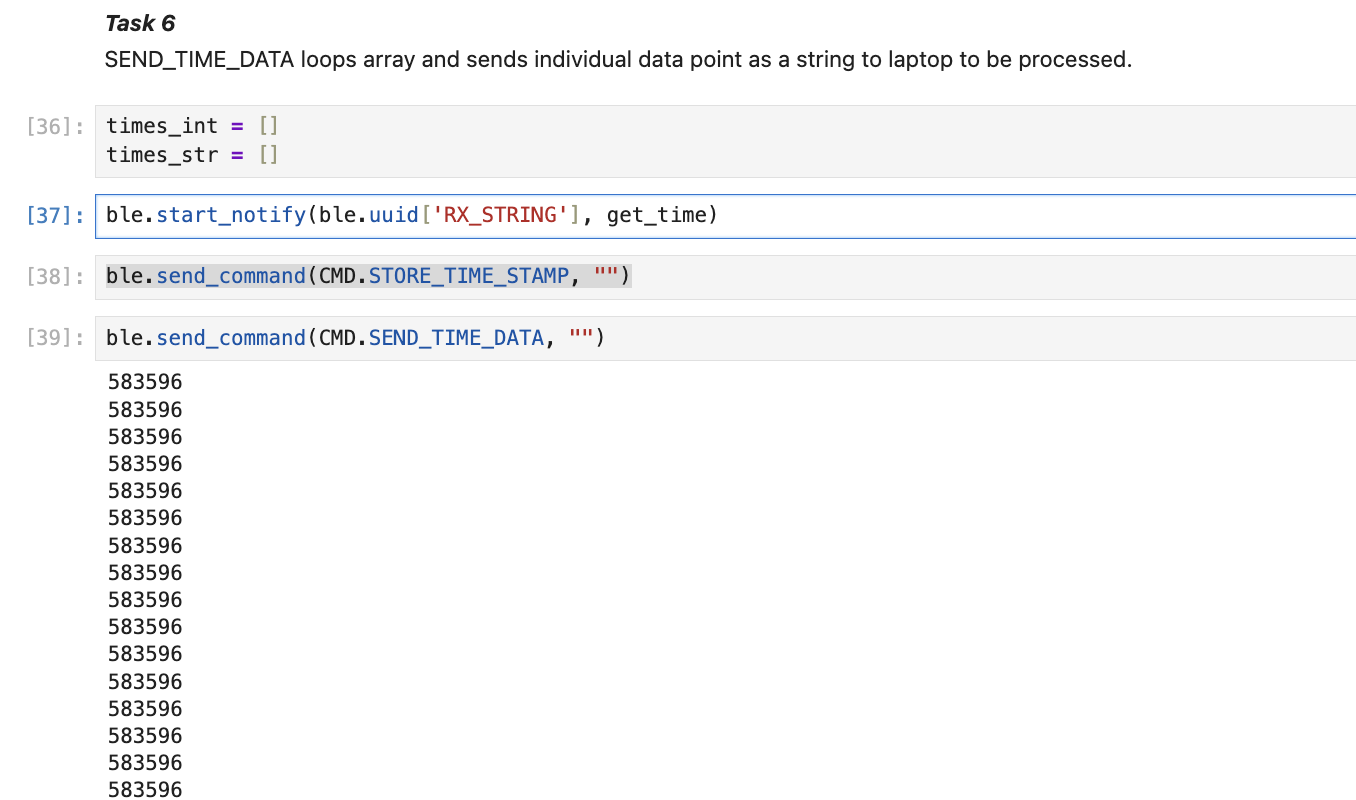
Task 6: store time stamp, SEND_TIME_DATA command
For Task 6, I implemented a store-then-send approach to compare with Task 5's real-time transmission. On the Arduino side, I defined a global array unsigned long arr[ARRAY_SIZE] with ARRAY_SIZE = 100 to store timestamps. I created a STORE_TIME_STAMP case that loops 100 times and stores millis() into the array at each iteration without sending anything over BLE. I then created a separate SEND_TIME_DATA case that loops through the array and sends each stored timestamp as a string to the laptop, with a 10ms delay between sends to prevent data loss.
On the Python side, I reused the same notification handler from Task 5 to receive and store the incoming timestamps. After running both commands, I checked len(times_int) to verify all 100 timestamps were received.
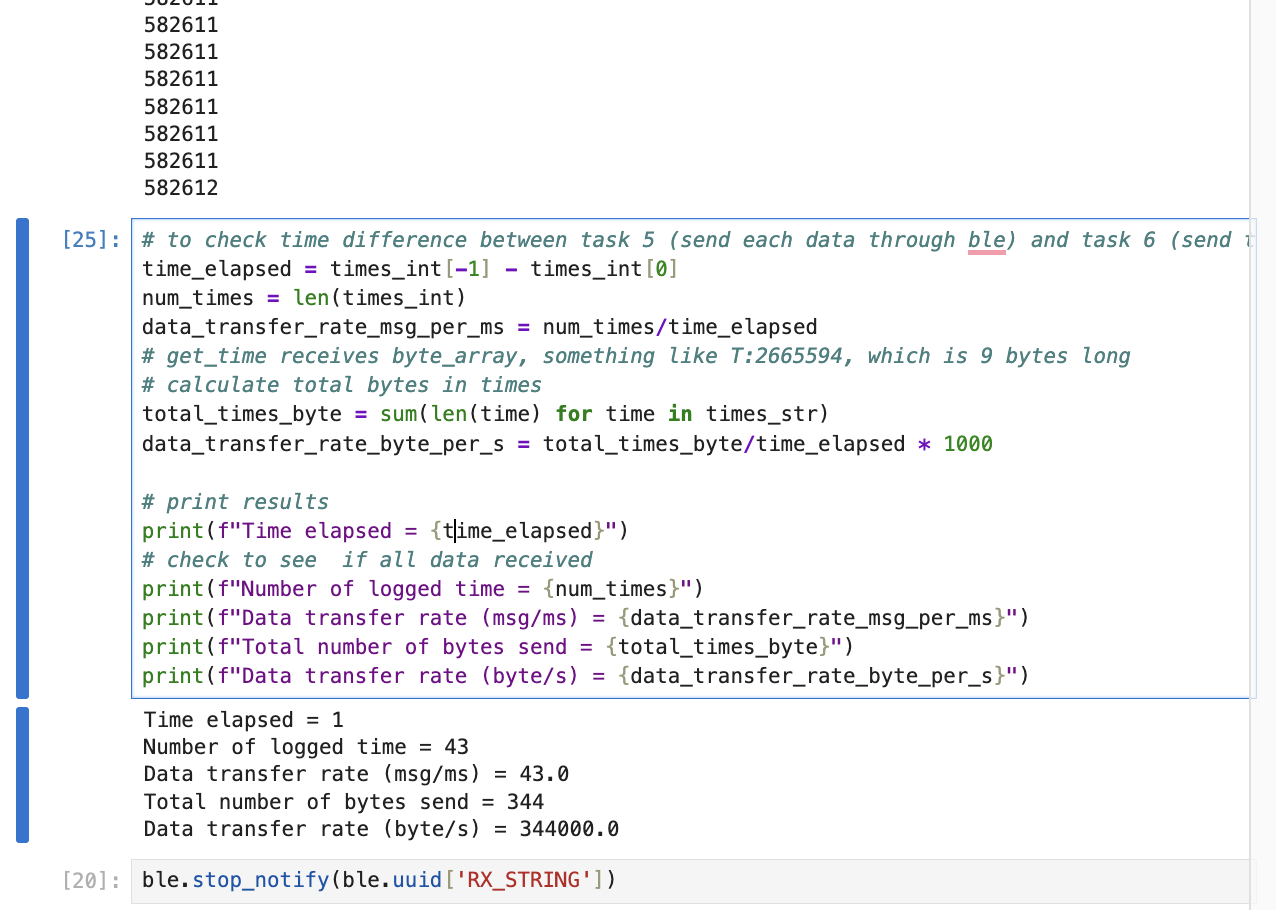
My results showed that the time elapsed between the first and last timestamp was only 1 millisecond, meaning the Arduino collected all 100 data points almost instantaneously. However, I initially only received 43 out of 100 messages because the Arduino was sending faster than BLE could handle. Adding a small delay in SEND_TIME_DATA fixed this issue. The key finding is that storing data first removes the BLE bottleneck during collection, allowing the Arduino to record data much faster than Method 1.
Arduino:
Python:
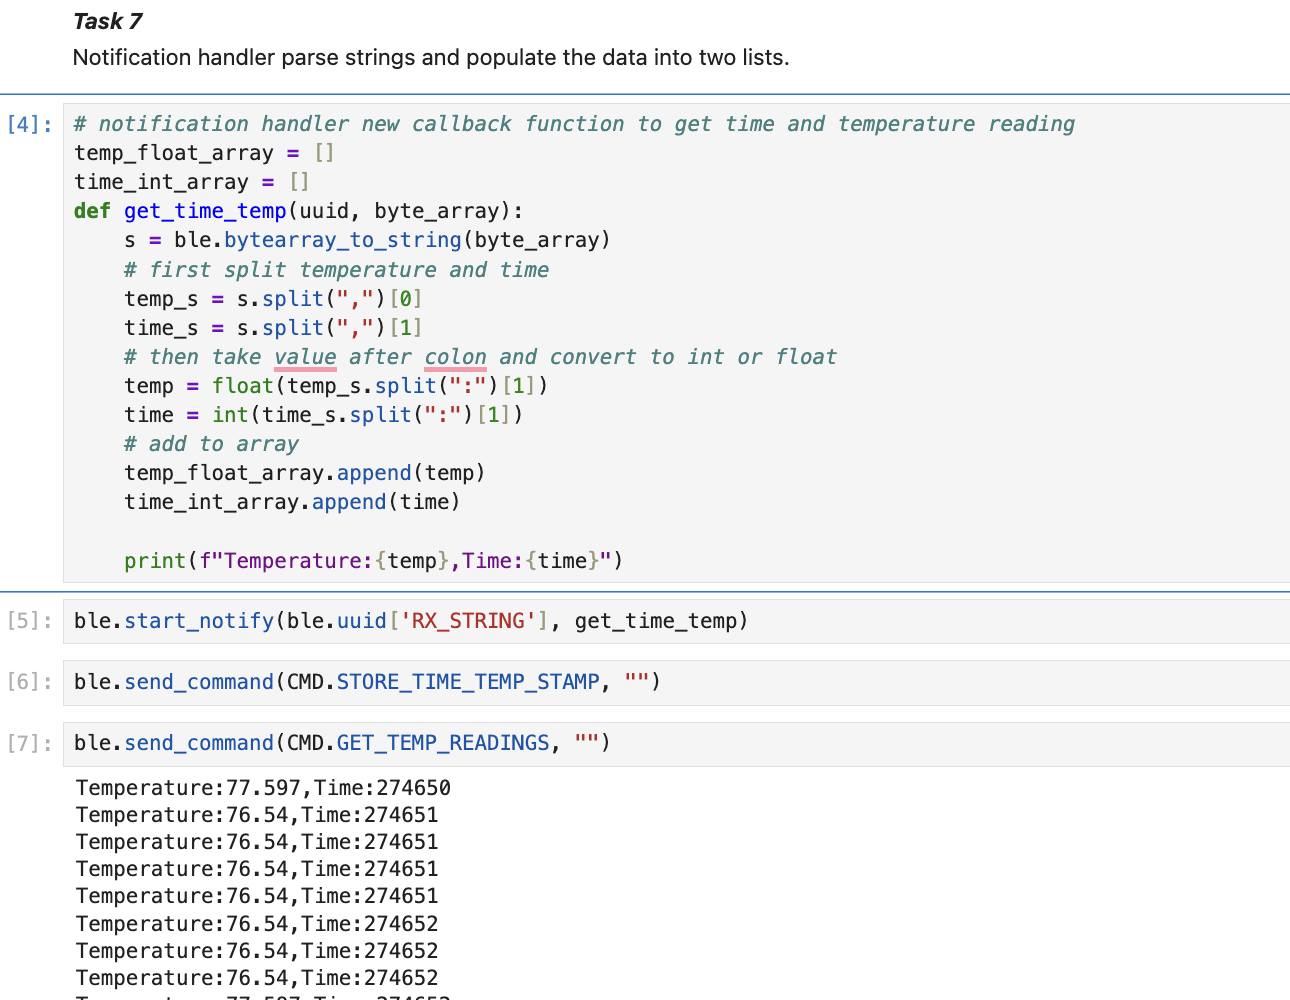
Task 7: temperature reading and time stamp
For Task 7, I extended the store-then-send approach to include temperature readings alongside timestamps. On the Arduino side, I defined a second global array float temp_arr[ARRAY_SIZE] to store temperature readings. I created a STORE_TIME_TEMP_STAMP case that loops through both arrays concurrently, storing millis() into the time array and getTempDegF() into the temperature array at each iteration, so that corresponding indices represent data collected at the same moment. I then created a GET_TEMP_READINGS case that loops through both arrays and sends each data point as a formatted string like "Temperature:72.5, Time:123456" to the laptop, with a 10ms delay between sends.
On the Python side, I wrote a new notification handler get_time_temp() that parses the incoming string by first splitting on the comma to separate temperature and time, then splitting each part on the colon to extract the numeric values. The temperature is converted to a float and appended to temp_float_array, while the time is converted to an int and appended to time_int_array. This allows me to collect synchronized temperature and time data stamp.
Arduino:
Python:
Task 8: Differences between these two methods
Method 1, sending data immediately over BLE, achieved a data transfer rate of approximately 12 messages per second or 94 bytes per second. The main bottleneck is BLE transmission. The Arduino must wait for each writeValue() to complete before continuing to the next iteration. The advantage of this method is that data is available in real-time on the laptop, and there are no memory constraints since data is not stored on the Artemis. However, this approach is too slow for capturing rapid events.
Method 2, storing data first then sending, can collect data much faster because it is not limited by BLE transmission speed. My results showed that collecting 100 timestamps took approximately 1 millisecond, which translates to roughly 100,000 samples per second. The disadvantage is that this method is limited by the Artemis's RAM. With 384 kB of RAM available, the theoretical maximum storage is 393,216 bytes. For timestamps only (4 bytes each as unsigned long), this allows approximately 98,304 values. For timestamps plus temperature readings, that is 8 bytes per data point, which allows approximately 49,152 data points. Since the program code, BLE stack, and other variable declaration also requires memory, a realistic estimate will be even smaller.
Method 1 would be preferred if a lot of data will be collected (data will be collected in long duration), and the speed of sampling will not matter. Method 2 would be preferred for capturing rapid sensor changes, where high sampling rates are critical but the event duration is short enough to fit within memory constraints.
References:
I referenced Jeffery Cai and Jack Long's websites to format and write my lab report.